Adding screenshots for visual syms
Visual Syms allow you to mimic the actions an agent should take in your software while speaking with a customer. This includes clicking on buttons, entering text or saving documents.
First though, you must have screenshots of those software applications. And for your Visual Syms to work well for Trainees, these screenshots must look good. So, proper screenshots are a must. Below are a number of tools to use to capture good screenshots for your Visual Sym.
Microsoft Windows Snipping Tool
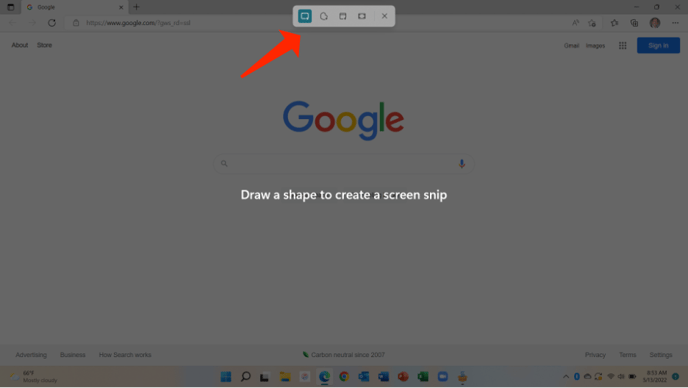
On WIndows (10 or 11), Microsoft provides a snipping tool. To start this tool, press the Windows logo key along with the "shift" key and then "s". You will then see the tool on the top of the page. You can then with your mouse or trackpad drag the cursor and choose what you want to capture.
Apple Screenshots
On a Mac, the MacOS has a native tool for capturing a screen. To initiate this tool, press "shift", "command" and "5" to bring up the native tool. Your Mac will show a tool on screen which will then let you choose what and how you can capture.

If you click on the dashed window icon, Apple will capture any section of your screen letting you decide what that section is.
Snagit
Snagit is a software application from Techsmith and is available for both Windows and MacOS. Snagit does require you to purchase a license to use it.
General Tips for Screenshots
- Use the original screenshots when building syms, for best image quality. We don't recommend shortcuts such as right-clicking on images in Word docs and selecting "Save as Picture." This generally produces extremely low quality, grainy images.
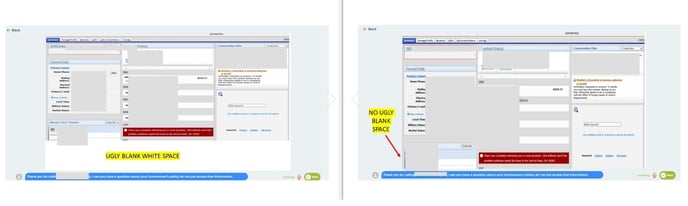
- Screenshots with a 16:9 aspect ratio look best (1920 x 1080). However, other sizes (including 800x600) will work. Make sure your screenshots aren’t too short and wide, or they will result in an unattractive user interface. See below.
- Keep screenshot sizes consistent so that trainee doesn’t see abrupt changes as they progress through the sym.
- If your browser is zoomed out so that you can see more of your screen, make sure you’re not zoomed out so much that it’s hard to read the font.
- Make sure your screenshots have no Personally Indentifiable Information (PII). Two methods for doing this:
-
- Use PowerPoint
- Import screenshot into PowerPoint
- Add shapes to cover the PII
- Save slide as a .png or .jpeg
- Upload that into SymTrain
- Create a test account in the software platform you are using, populate it with data of a fictitious customer, and take screenshots with that test account pulled up. Then no PII redaction is necessary.
- Use PowerPoint