Learn how to edit/customize existing syms.
Are you a new customer who has just purchased a new library of syms? Congrats!
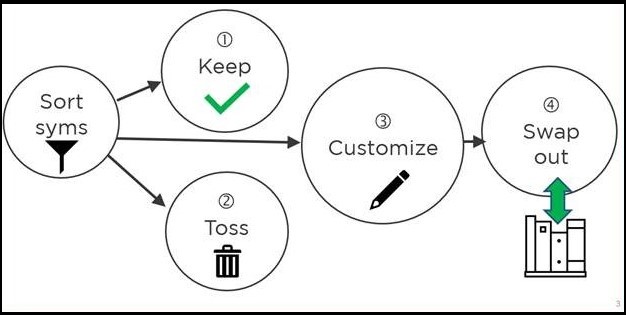
Your next step is to run each sym in your library to identify which action below to take with it:
- Keep (sym is ready to use out of the box; add label "Keep")
- Customize (needs edits; add label "Customize")
- Toss (sym not useful or applicable; add label “Toss”)
Here’s how to add labels: https://help.symtrain.com/knowledge/sc18.-how-to-use-labels
WATCH THIS TUTORIAL. https://help.symtrain.com/knowledge/sc17.-customizing-syms-tutorial
This ~5 minute video gives an overview of the process.
and this ~30 minute tutorial walks you through the entire process with exercises to reinforce your learning.
PREWORK (5 min)
- Log in to SymTrain
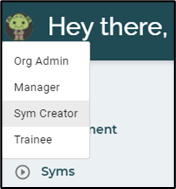
- Click on avatar in upper left corner and choose Trainee from drop down menu.
- Go to My Syms in the menu.
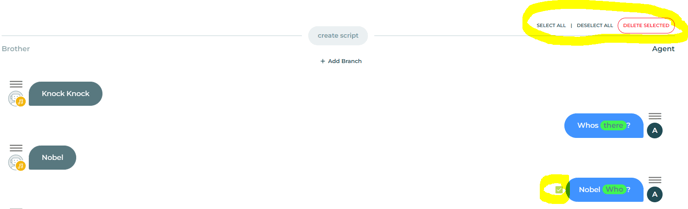
- Find the sym knock knock Nobel and run it.
ALWAYS CLONE SYMS BEFORE CUSTOMIZING OR EDITING THEM.
This ensures you always have a backup (master) copy of the original sym. We are working on an Undo feature but until that is in place, CLONING syms before editing them will save you from headaches.
CLONE A SYM (5 min)
- Click on avatar in upper left corner and choose Sym Creator from drop down menu.
- Click on Syms in menu on left hand side.
- Find the sym knock knock Nobel.
- Clone sym by clicking on two squares icon. This creates copy of sym that you can edit.
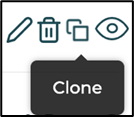
- It will show up as Copy of knock knock Nobel 1 at the bottom of the list. Click on pencil icon to edit.
- In Enter your Sym Name and Version, rename to kk_yourname. Click on PROCEED.
- Go to EDIT SCRIPT LINE step 1 to edit script lines.
EDIT SCRIPT LINE (5 min)
- Click on any line. Choose Edit in popup menu. Then in bottom left corner, click in text field as shown and edit the line as you wish. In the example below, you can click on Great! I know you're going to love it.

- Click Save to save your work.
ADD SCRIPT LINE (5 min)
- Click on very last line. Choose Add next line.
- Click on green (left) icon to indicate you are adding a Sym (computer) script line:

- Where it says Type in your script, enter text below:
Brother: What did you think of that joke?
- Click Save.
- Click on the line you just added, “What did you think of that joke?” and choose Add next line.
- Click on A (right) icon to indicate you are adding an Agent (trainee) script line.

- Where it says Type in your script,enter the text below:
Agent: That was cute. - Click Save.
- Click Proceed.
- Click Publish sym to save your work and exit.
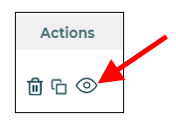
- Find sym kk_yourname and click on eyeball icon to preview sym. This lets you run the sym to see what the experience is like for trainees.
ADD KEYWORDS (3 min)
- Find sym kk_yourname.
- Click on pencil icon to edit it.
- Click on last line “That was cute.”
- Choose Add keyword.
- Positive keywords: In Pick From Script Line field, click on cute.
- (Optional) Enter a synonym for cute that you’d like to give credit for as well.
- Negative keywords: Ridiculous is not in script. To discourage trainees from using that word, make it a hidden keyword that will detract from their score if used. In Enter Keyword field, type ridiculous. Assign it -3 points.
- Click Publish sym to save your work and exit.
DELETE SCRIPT LINE (1 min)
- Find sym kk_yourname.
- Click on pencil icon to edit it.
- Delete the two lines you added in steps D3 and D7.
- Click Publish sym to save your work and exit.
ATTACH AUDIO (3 min)
Replace the Text-to-Speech (computer-generated) voice with your own voice for sym kk_yourname.
Method 1: Record your own voice directly in platform
- Find sym kk_yourname.
- Click on pencil icon to edit it.
- Click on first Brother script line “Knock knock.”
- On popup menu, click on Attach audio.
- In bottom left corner, click on Remove to remove current computer-generated recording.

- Click Start recording.
- When you see Speak turn red in the text field, say "Knock knock."
- When done, click Stop.
- Click green play button to listen to your recording. If it sounds good, proceed to step 10. If not, re-record it.
- Click Upload.
- A gold musical note icon will appear. This confirms successful upload.
- Click Exit Audio Attach mode.
- Click Proceed.
- Repeat steps 3 to 13 for remaining Brother lines, so that they are all in your voice. Otherwise the sym will have a mixture of both the computer voice and your voice.
- Click Publish Sym to exit.
Method 2: use an existing audio .wav file
This is useful when you wish to have someone else's voice for the sym instead of your own. It is also how you can have two different sym voices in the same sym. For example, you can have a robotic voice state "This completes your simulation" as the last line of the sym.
For the customer voice, use your own audio or upload a .wav file, and for the Coach Sym voice you can use a Text-to-Speech (TTS) voice.
- Have .wav file available. It doesn’t matter what the content is for the purpose of this training. All that matters is that it is in .wav format.
- Find sym kk_yourname.
- Click on pencil icon to edit it.
- Click on first Brother script line “Knock knock.”
- On popup menu, click on Attach audio.
- In bottom left corner, click on Remove to remove current computer-generated recording.
- Click on musical note.

- Drag or upload .wav file into the area indicated.

- Click Exit Audio Attach mode.
- Click Proceed.
- Repeat steps 3 to 10 for remaining Brother lines.
- Click Publish Sym to exit.
ADD UPDATED SYM TO MODULE (3 min)
- Go to Modules
- Find Knock knock jokes module.
- Click on pencil icon to edit module.
- Check the sym kk_yourname.
- Click
- Click Edit Module to save your work and exit.
- Optional: Turn on Use Sequence feature.
- Click on pencil icon by module to edit it.
- Turn on Use sequence. This presents syms to trainees one at a time. You set the order. This is good for situations where knowledge builds on top of existing knowledge.
- Hit Proceed.
- In last column (Reorder), click and drag icons to reorder syms as desired.
- Click Edit module at bottom right to save your work.